Navigation: Employees >
Fingerprint Login


|
Navigation: Employees > Fingerprint Login |
|
Amigo Pos includes an integrated fingerprint management system designed specifically for the Digital Persona U-R-U 4500 (and 4000) USB fingerprint reader, allowing enhanced security to eliminate the possibility of password or login id sharing among employees. All necessary device drivers for the Digital Persona U.R.U 4500 are installed with Amigo Pos. Do not install any additional drivers or any 3rd party fingerprint management software. Simply connect the fingerprint reader to a USB port and restart Amigo Pos.
User Login Configuration
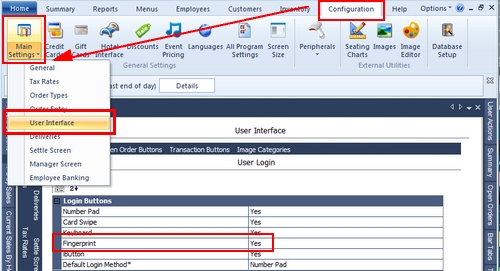
Begin by enabling Fingerprint Login in Back Office > Configuration > Main Settings >User Interface. Ensure that the box under the Disable column is unchecked next to the Fingerprint Login type. At least one other login type must also be enabled until the fingerprint login system is configured.
Fingerprint Login Enabled
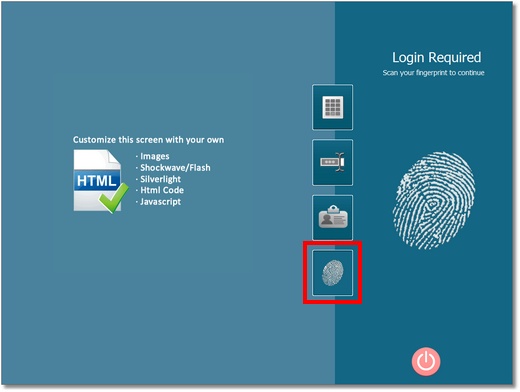
Confirm that the fingerprint login icon appears on the Amigo Pos 7login screen.
Selecting the Finger to Enroll in the Fingerprint Management Utility
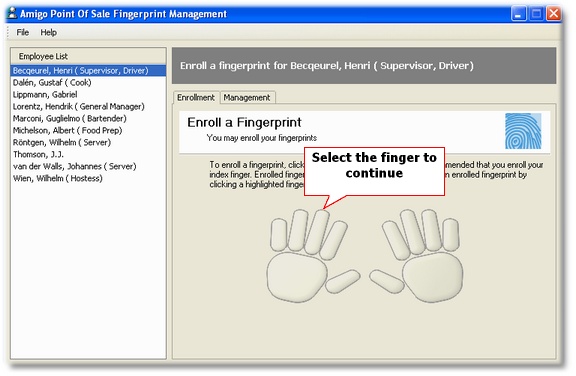
Shut down Amigo Pos 7and click the shortcut to the Fingerprint Management Utility located in the Start - All Programs - Amigo Pos program group. A list of all employees appears on the left side of the screen. Select a user and click on the finger to enroll. Although multiple fingers can be enrolled for each employee, it is recommended that a single finger is enrolled. For example, if your system utilizes an integrated fingerprint scanner located on the right side of the pos pos station, the right index fingerprint may be enrolled for each employee. Enrolling only a single fingerprint for each employee also ensures extremely fast fingerprint matching during login and that the database size is not unnecessarily increased.
Scanning the selected finger in the fingerprint management utility
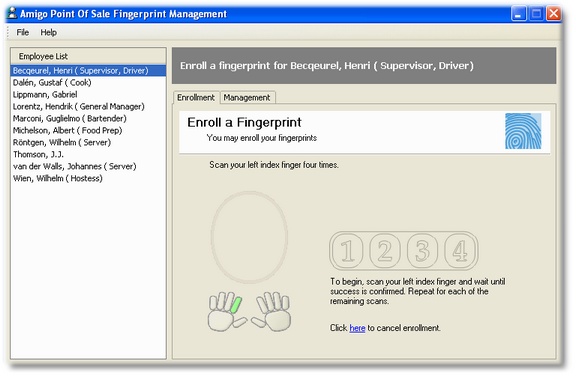
After the finger is selected, instruct the employee to scan the selected finger 4 times, waiting for a confirmation of a successful scan between each scan attempt.

Four successful scans are required to enroll the finger
Each successful scan is indicated by a blue oval. When all four ovals are blue, the employee's scan is saved to the database.
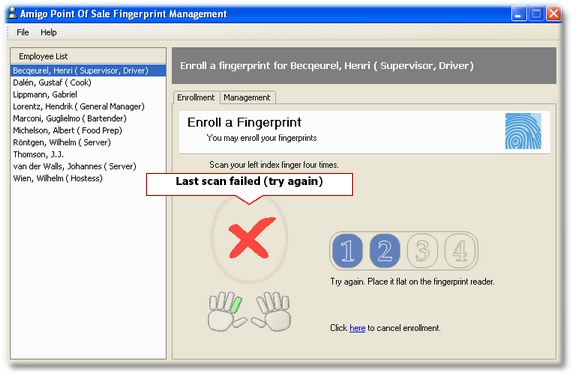
An unsuccessful scan is indicated by a system beep
An unsuccessful scan is shown above. Unsuccessful scans may be caused by improper finger placement or a dirty scanner bed.
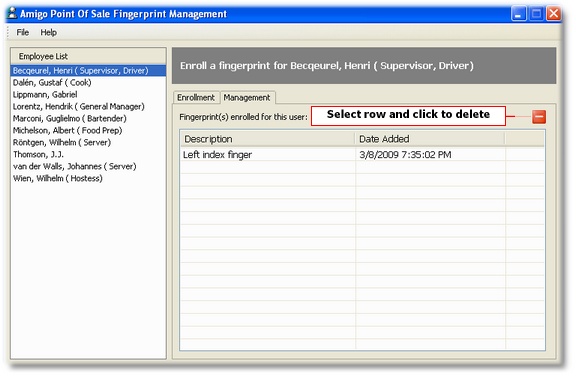
Viewing the selected employee's enrolled fingerprints
Confirm that the fingerprint is stored in the database by clicking the Management tab after selecting the employee. All fingerprints stored for the selected employee appear on the list. If a mistake is made, select the fingerprint and click the red delete button to permanently delete the selected fingerprint entry.
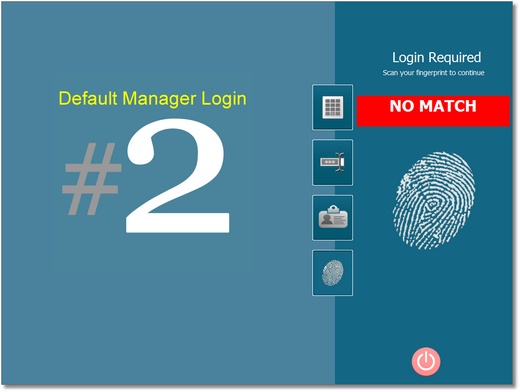
An unsuccessful login attempt
If an employee that does not have an enrolled fingerprint attempts to login, the NO MATCH message appears. Otherwise, the employee is logged in normally.
Page url: http://www.amigopos.com/help/html/index.html?fingerprint.htm